🔧 Arduino Software Overview & Uploading Your First Code – Full Guide for Beginners (2025)
 1")
🧠 What is Arduino Software? – An Overview
The Arduino software overview & uploading your first code is the most essential first step for anyone starting their journey into the world of electronics and microcontrollers. The Arduino platform is widely known for its ease of use, especially among beginners. At the heart of this platform is the Arduino IDE (Integrated Development Environment). This is the primary software used to write, compile, and upload code, commonly called “sketches,” to Arduino-compatible boards.
Arduino IDE is an open-source, beginner-friendly platform designed to simplify the programming and development of electronics projects. It features a clean and intuitive interface that supports multiple operating systems, including Windows, macOS, and Linux. One of its biggest advantages is that it removes the barriers of complex coding, making it accessible even to those with little or no prior programming experience.
With the Arduino IDE, users can write, compile, and upload code directly to their Arduino boards, enabling them to bring a wide range of innovative ideas to life. Whether you’re starting with something simple like blinking an LED or advancing toward building sophisticated IoT-based automation systems, the journey begins with a solid understanding of the Arduino Software Overview & Uploading Your First Code.
Learning the Arduino Software Overview & Uploading Your First Code is a crucial step for any electronics enthusiast. It not only introduces you to the core functions of the IDE but also teaches you how to communicate with your board efficiently. From writing your first sketch to seeing your project come alive, this hands-on experience lays the foundation for countless possibilities in the world of embedded systems and DIY electronics.
💻 Arduino IDE: The Core of Arduino Software
The Arduino IDE serves as the command center for all Arduino projects. It supports C/C++ programming and includes built-in examples, syntax highlighting, a serial monitor, and a code editor.
 2")
🔹 Key Features of Arduino IDE:
- Simple and Clean Interface: Write, test, and upload sketches with minimal distractions.
- One-click Code Verify & Upload: Easily verify syntax and errors.
- Serial Monitor & Plotter: Debug and visualize data from sensors.
- Extensive Library Manager: Include ready-to-use libraries for sensors, motors, displays, and more.
- Board Manager: Add support for third-party and custom boards.
- Auto-formatting & Syntax Highlighting: Makes code readable and organized.
The IDE is regularly updated and has strong community support.
👉 Download Arduino IDE from Official Site:
 3")
https://www.arduino.cc/en/software
🖥️ Arduino Software Overview – User Interface
Once installed, the Arduino IDE provides a beginner-friendly interface. Here’s an overview:
 4")
| Element | Description |
|---|---|
| Editor | Space to write and edit code |
| Toolbar | Buttons to Verify, Upload, Save, and Monitor |
| Console | Displays real-time output, errors, and logs |
| Bottom Bar | Shows selected board and communication port |
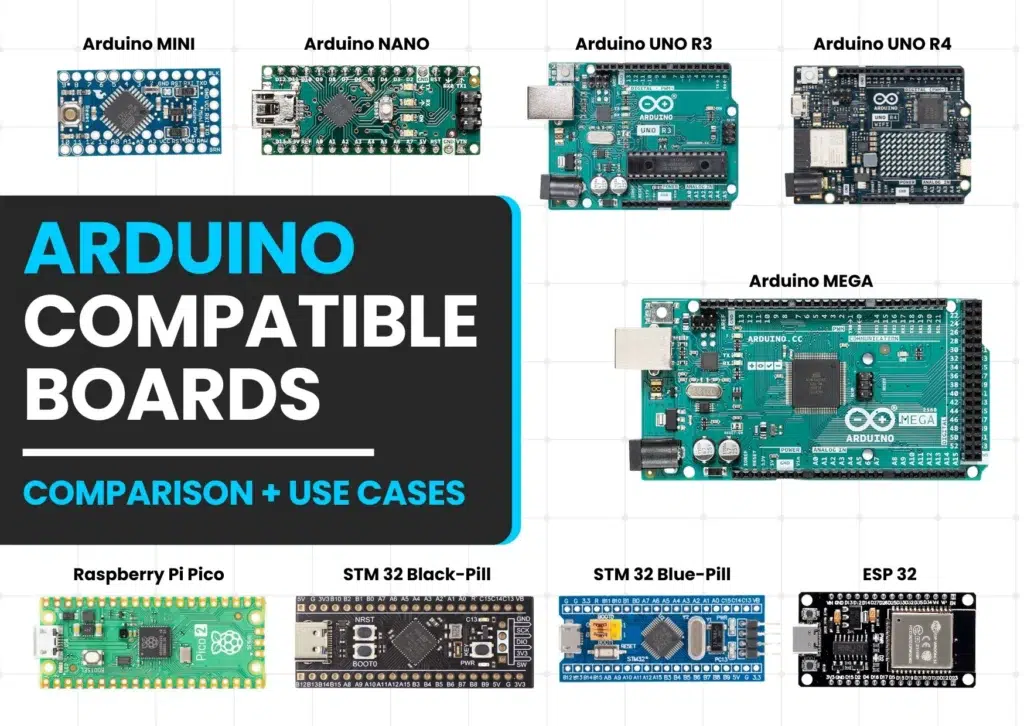
Internal Resource: Read more about Types of Arduino Boards
✍️ Writing Your First Arduino Code (Sketch)
Arduino code is structured in two primary functions: setup() and loop(). Here’s a basic example that blinks the onboard LED:
void setup() {
  pinMode(13, OUTPUT); // Set digital pin 13 as output
}

void loop() {
  digitalWrite(13, HIGH); // Turn LED on
  delay(1000);            // Wait for 1 second
  digitalWrite(13, LOW);  // Turn LED off
  delay(1000);            // Wait for 1 second
}
📌 Breakdown:
- setup(): Initializes board settings. Runs only once.
- loop(): Contains instructions that repeat forever after setup.
🕼️ Uploading Your First Code to Arduino Board
🚀 Step-by-Step Guide:
- Connect your Arduino board using a USB cable.
- Open Arduino IDE.
- Go to Tools > Board and select your model (e.g., Arduino Uno).
- Go to Tools > Port and choose the correct COM port.
- Paste the code into the IDE.
- Click the Upload button (right arrow icon on the toolbar).
- Wait for the message “Done Uploading.”
If successful, your Arduino will blink the onboard LED every second.
📀 Why the Arduino IDE is Important
Understanding the Arduino software overview & uploading your first code is not just about writing programs – it’s about developing the mindset to explore technology. Here’s why the IDE is so crucial:
✅ Benefits:
- Free and Open-Source: Anyone can access and modify it.
- Extremely Lightweight: Runs smoothly on low-end systems.
- Beginner-Friendly: Designed with education in mind.
- Powerful for Experts: Supports advanced functionality with plugins.
- Expands Creativity: Ideal for school, college, and professional prototyping.
🧠 Final Tips for Beginners
- Use Ctrl + R to verify syntax before uploading.
- Explore File > Examples for working templates.
- Install additional libraries via Sketch > Include Library > Manage Libraries.
- Use Tools > Serial Monitor to debug sensor data.
- Always check Tools > Port before uploading sketches.
📅 Conclusion: Getting Started with Arduino IDE in 2025
In this detailed guide on Arduino Software Overview & Uploading Your First Code, you’ve learned:
- What the Arduino IDE is and how it functions
- How to download, install, and set up the IDE
- How to write and understand a simple Arduino sketch
- How to upload your sketch to your Arduino board
With this foundation, you’re ready to dive into sensors, motor control, displays, automation systems, and real-world Internet of Things (IoT) applications.
🔗 Explore more tutorials and electronics guides at: https://electrolab.in
👍 Like this post? Share with fellow Arduino enthusiasts, and leave a comment with your first project idea!


